How Do I Access My Raspberry Pi Remotely
Are you ready to unlock the full potential of your Raspberry Pi, transforming it from a local project into a global powerhouse?
The ability to remotely control your Raspberry Pi opens doors to a world of possibilities, from managing smart home systems to orchestrating complex robotics projects from virtually anywhere on Earth.
The modern world is interconnected, and our devices reflect this reality. Raspberry Pi, the diminutive yet powerful single-board computer, has become a cornerstone of the Internet of Things (IoT) revolution. Its versatility allows for countless applications, but its true potential is unleashed when you can access it from afar. This article delves into the essential techniques for remotely accessing your Raspberry Pi, ensuring you can connect to your device, manage your projects, and troubleshoot issues regardless of your physical location.
The core principle involves establishing a secure, password-free connection to your Raspberry Pi. This is achieved through the use of Secure Shell (SSH) keypairs. Instead of repeatedly entering your password, you can use a cryptographic key to authenticate your access. This method enhances security and streamlines the connection process, allowing you to swiftly access your Pi's terminal.
Before diving into the intricacies of remote access, it's important to consider a few prerequisites. First and foremost, you'll need your Raspberry Pi to be connected to the internet. An ethernet connection is often recommended for optimal speed and stability, but a reliable Wi-Fi connection will also suffice. Secondly, you'll require a computer a PC, tablet, or even a smartphone that you'll use as your control center. This will be the device from which you'll issue commands, view the Pi's desktop (if applicable), and manage your projects.
Remote access essentially means controlling your Raspberry Pi from another device. This can be within your local network or, depending on your setup, from anywhere with an internet connection. Several methods exist to achieve this, each with its own nuances and trade-offs. Two popular options are accessing the terminal via SSH and utilizing Virtual Network Computing (VNC) for full desktop control.
For many users, SSH is the preferred method for remote access. It provides a command-line interface to your Raspberry Pi, allowing you to execute commands, transfer files, and manage your system. SSH is generally considered secure and efficient, making it ideal for tasks such as server administration, code development, and basic device control. SSH, in its essence, allows you to tap into the core of your Pi, allowing for manipulation via commands.
Alternatively, VNC allows for complete control over your Raspberry Pi's desktop interface. This is particularly useful if you need to interact with graphical applications, monitor the visual output of your projects, or troubleshoot issues that require a visual representation. VNC enables you to experience your Raspberry Pi as if you were sitting directly in front of it, making it a versatile tool for various applications. The process involves installing and configuring a VNC client, and accessing the Raspberry Pi's desktop on the remote machine.
To simplify the remote access process, we can preconfigure the operating system image with a Raspberry Pi Imager. This method gives us the chance to set up the essential configurations, including SSH keys, before booting up the Raspberry Pi. Pre-configuring these keys enables seamless, password-free access from the moment the device is connected to the network.
Lets break down the process to give a clear and detailed picture. To begin, the first step is to generate an SSH keypair. The keypair consists of a public key and a private key. The private key is what youll keep secure on your computer, while the public key will be placed on your Raspberry Pi. This key then tells the Raspberry Pi to accept connections from your computer.
Once you have the keys generated, you can use the Raspberry Pi Imager to create the operating system image on your SD card. During the configuration process, you can pre-configure your SSH keys by either generating a new keypair or using an existing one. This step ensures that your Raspberry Pi is ready for remote access from the moment it boots up.
For those who prefer to access the Raspberry Pi through the command line, once the Raspberry Pi is running and connected to your network, the process is straightforward. Youll need to log in locally and enable SSH using the command line. This usually involves enabling the SSH service via the Raspberry Pi's configuration tool or the command line. Once SSH is enabled, your Raspberry Pi will be ready to accept remote connections.
Let us talk about the usage of a VNC client. Being able to remotely access your Raspberry Pi is a handy ability. A Raspberry Pi is often deployed in locations that are difficult for us humans to reach. To install and configure VNC, first, launch the Raspberry Pi and click on its icon from the desktop. After that, navigate to Preferences, Raspberry Pi configuration. Under the interfaces tab, toggle on VNC and click ok. After the toggle is complete, the Raspberry Pi is now ready for remote access.
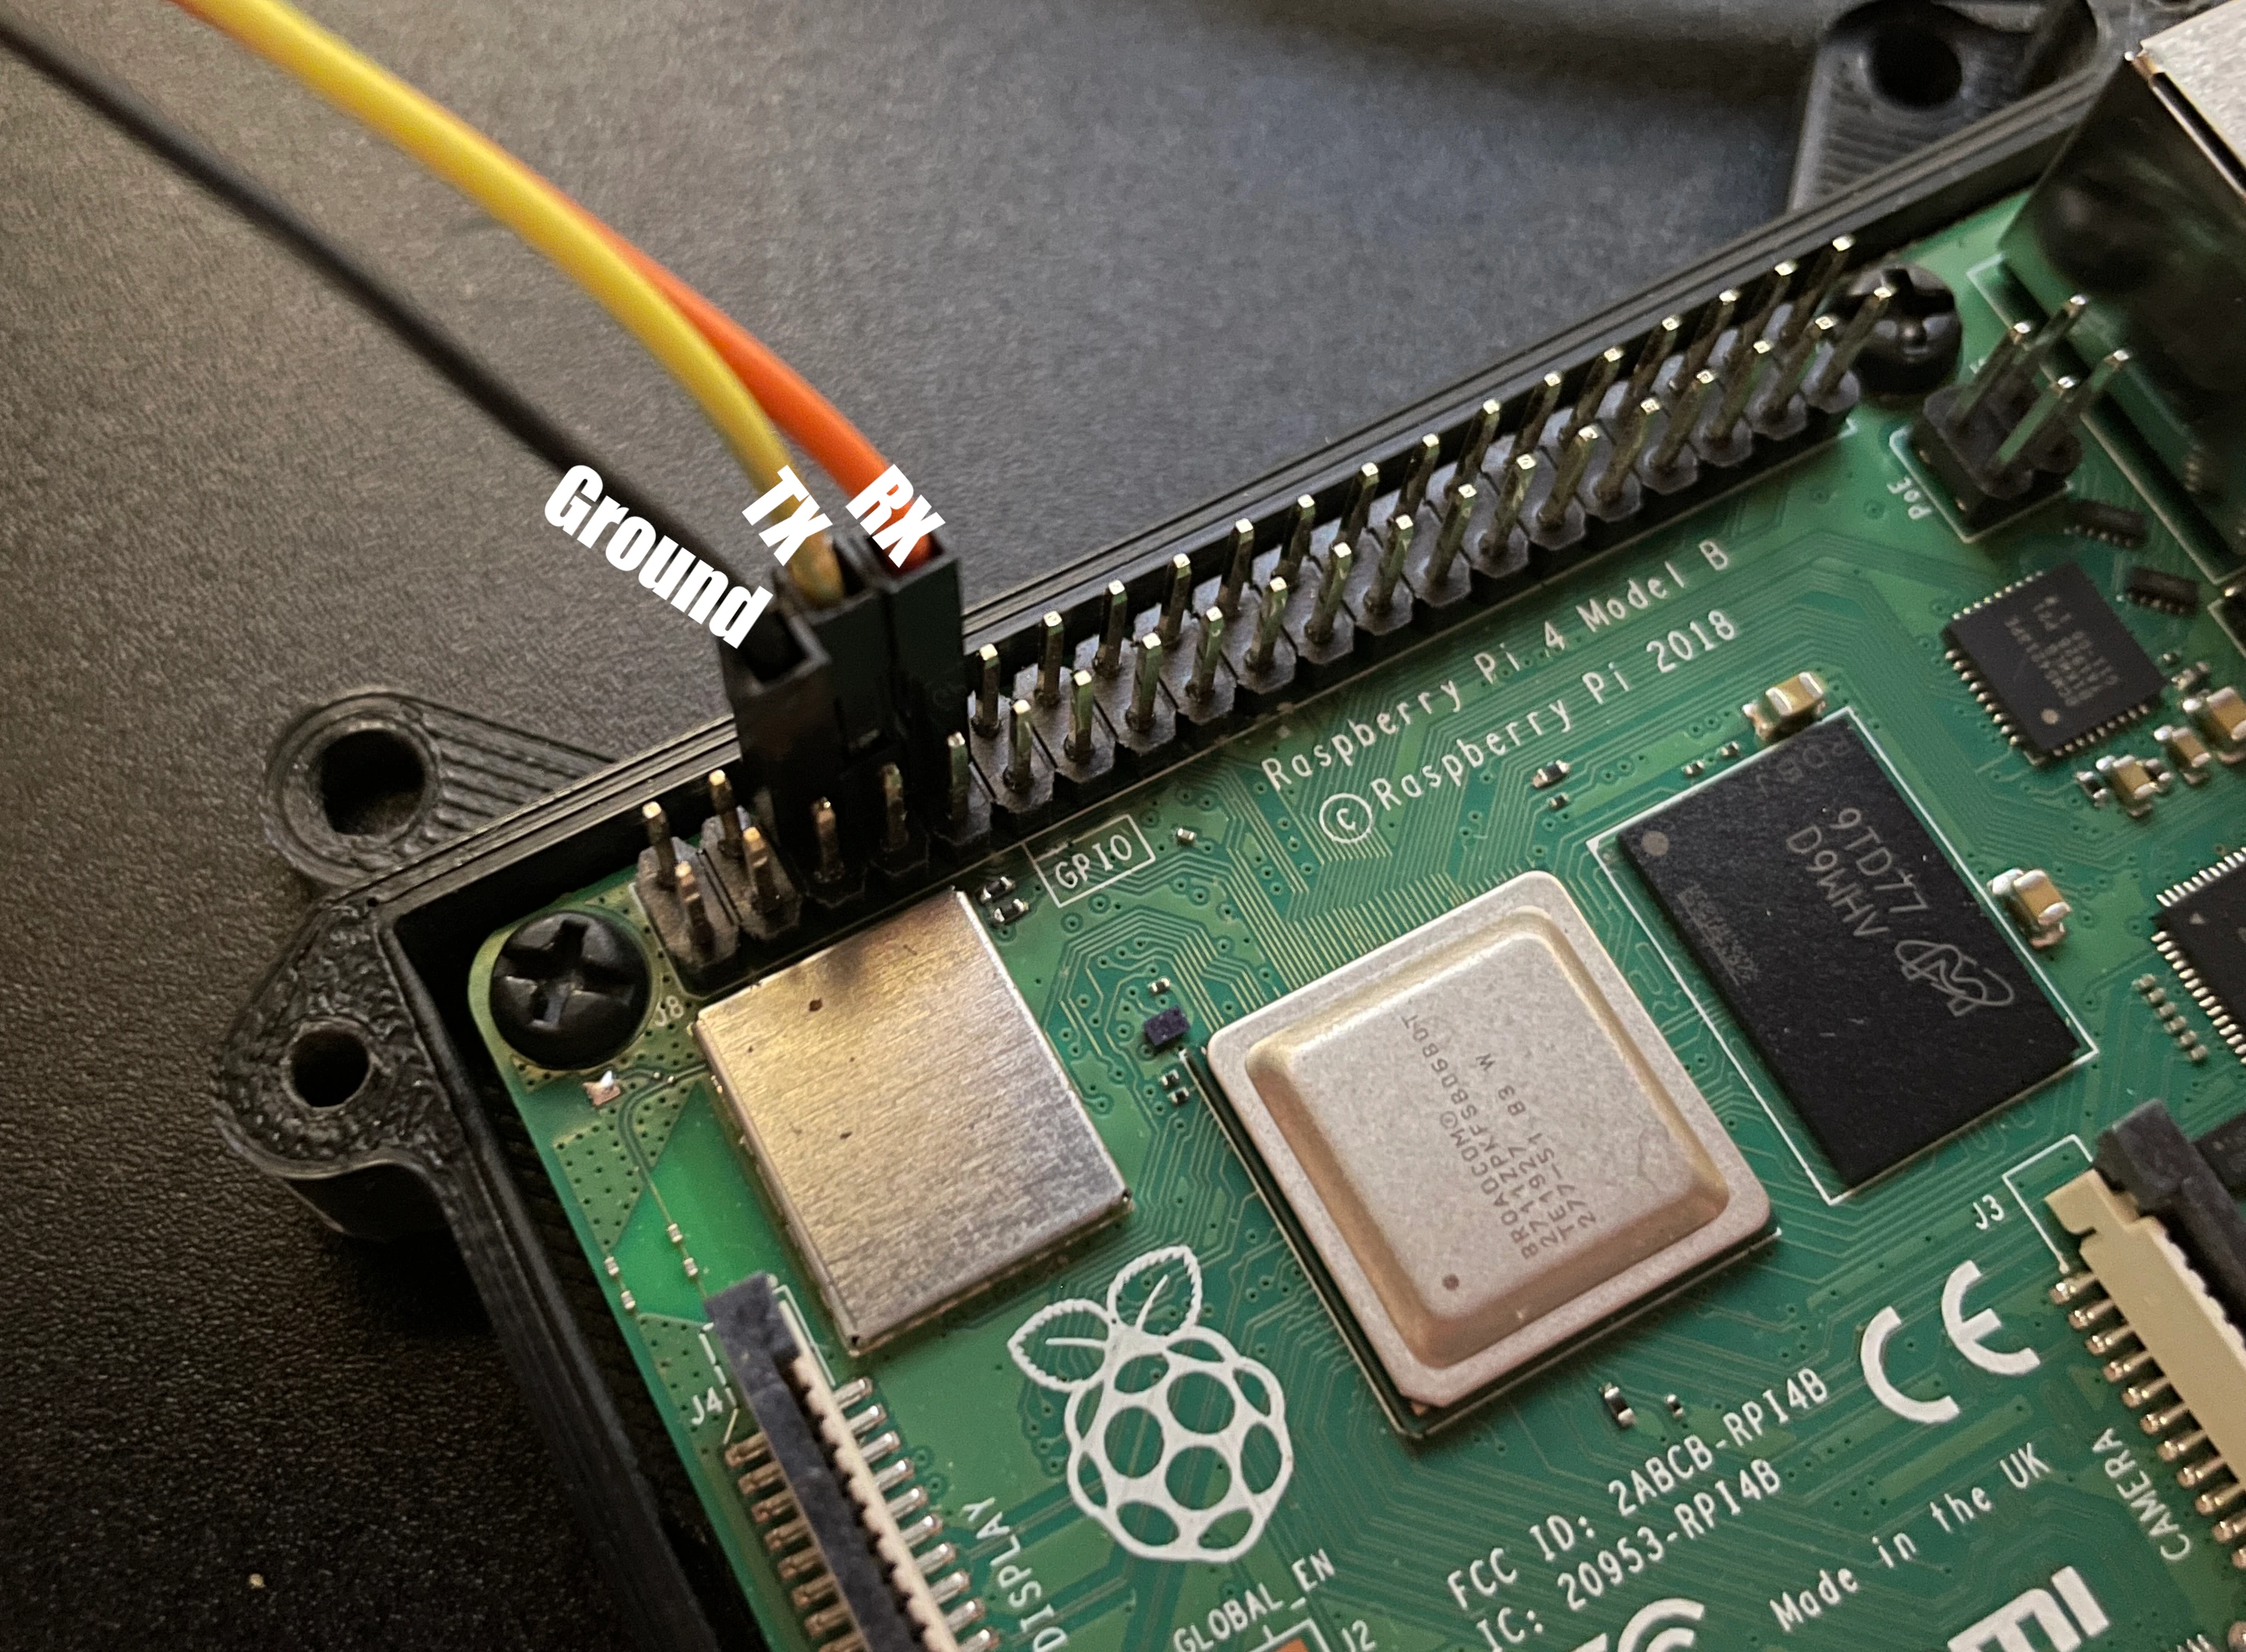
Beyond these common methods, there are some more involved solutions. For example, you can also use a serial or console cable to connect your computer and Raspberry Pi. This approach provides a direct, low-level connection that is helpful when setting up a device for the first time or troubleshooting network issues. This is a tried and true approach which can also be combined with remote access options. One important step is to install and configure the VNC client, and this, combined with the steps above, enables easy remote access.
Accessing your Raspberry Pi remotely requires a stable internet connection. Without a reliable connection, remote access is impossible. A constant connection ensures that the Raspberry Pi can communicate with the remote device. When dealing with remote access, an ethernet connection, recommended for its speed and stability, makes all the difference. This ensures smooth remote access without any lag.
Remember, the ultimate goal is to securely connect to your Raspberry Pi from anywhere in the world, and the skills you acquire in this process are crucial for any IoT project. Remote access to your Raspberry Pi is a skill that will enable you to explore and implement your project regardless of location. This means monitoring a home automation system or controlling a robot across the globe. This guide walks you through the necessary steps for remote access. Now, it is time to learn the skills to set up your Raspberry Pi.
For a comprehensive guide on preconfiguring an OS image with the Raspberry Pi Imager and setting up SSH keys, please refer to other detailed online resources and tutorials. These tutorials will provide specific instructions. This will guide you through the process. These resources provide step-by-step instructions, ensuring that you can easily set up remote access. Follow these instructions carefully.
Now, let's consolidate what we've covered. To begin, we discussed the core idea that the Raspberry Pi can be accessed and controlled remotely from your computer. We can use SSH or VNC. SSH allows access to the terminal remotely, and VNC to get full control of the desktop interface of your Raspberry Pi. Then, we discussed the role of Raspberry Pi Imager and how you can preconfigure SSH keys. The next step is to make sure that you have a stable internet connection to ensure that all the methods are working smoothly. With this information, you can set up the Raspberry Pi, and gain remote access from any location.
These steps allow users to tap into the potential of their Raspberry Pi from anywhere in the world. Remember that remote access to your Raspberry Pi is a crucial skill for anyone involved in IoT projects.
Let's summarize the key steps: create a password-free remote access with an SSH keypair, preconfigure the Raspberry Pi Imager, connect with an Ethernet cable, and use a computer to control your Pi.


