Vnc Pi Over Internet
Can you securely access and control your Raspberry Pi from anywhere in the world? The ability to remotely manage your Raspberry Pi, whether it's for home automation, server administration, or personal projects, is now easily achievable, and it's more secure than you might think.
The convergence of affordable computing power and readily available internet connectivity has sparked a wave of innovation. One such area experiencing rapid growth is the remote control of devices, particularly single-board computers like the Raspberry Pi. The need to access these devices, often deployed in locations inaccessible to the user, has driven the development of secure remote access solutions. Utilizing VNC (Virtual Network Computing) is a straightforward and efficient method. This technology allows a user to view and interact with a remote desktop environment. The challenge, and the focus of this examination, lies in accomplishing this securely over the internet, safeguarding against unauthorized access while maintaining optimal performance.
The core of establishing a secure connection involves several key components. Firstly, a reliable internet connection on both the Raspberry Pi (the client) and the user's computer (the viewer) is essential. Secondly, a VNC server needs to be installed and configured on the Raspberry Pi. Thirdly, and perhaps most crucially, a secure method for traversing the internet's complexities is required. This typically involves either port forwarding on the user's router or utilizing a secure tunnel, like SSH, to encrypt the VNC traffic. Each of these elements demands careful consideration to achieve a balance of usability, security, and performance. The setup involves configuring both the Pi and the user's computer, often involving steps such as port forwarding on the router, or employing a secure tunneling method using SSH (Secure Shell). Each element requires careful attention, but the rewards the ability to monitor and manage a device remotely are substantial.
Before we delve further into the technical aspects, let's pause and consider the practical implications. Imagine a scenario: You've set up a Raspberry Pi as a home media server, or maybe as a weather station collecting data. You are away from home. Being able to connect to the Pi remotely, monitor its status, and troubleshoot problems without physically being present is a huge benefit. This capability is the driving force behind the growing adoption of technologies like VNC over the internet. It offers not just convenience, but also the power to manage and maintain projects from any location with an internet connection.
The inherent challenge is security. Simply opening a port on a router and forwarding VNC traffic directly to a Raspberry Pi is a risky proposition. It makes the Pi vulnerable to attackers who could potentially gain access to your network and data. The solution lies in adopting secure communication protocols and employing robust security practices.
VNC, at its heart, is a screen-sharing protocol. It transmits the contents of a screen, along with keyboard and mouse inputs, over a network. The standard VNC protocol, however, is not inherently encrypted, posing a significant security risk when used over the internet. Several methods are used to secure the connection. Using SSH tunneling to encapsulate VNC traffic is one common approach, as SSH provides strong encryption. Another approach involves using a VPN (Virtual Private Network) to create a secure, encrypted connection between the user's computer and the network where the Raspberry Pi resides. The best option will depend on your specific needs and technical capabilities.
Let's outline the step-by-step process for setting up VNC access to a Raspberry Pi over the internet using SSH tunneling. This is generally considered a secure and reliable method. First, ensure that the Raspberry Pi is connected to your network and has a static IP address (or a DHCP reservation on your router to ensure that its IP doesn't change). Next, install a VNC server on the Pi. Popular choices include TightVNC, RealVNC, and TigerVNC. Configure the VNC server with a strong password. Crucially, before configuring the VNC server itself, you must establish an SSH connection to the Raspberry Pi. This will act as a secure tunnel for your VNC traffic. Install an SSH client on your computer (most operating systems have one built-in, such as `ssh` in Linux and macOS, and PuTTY in Windows). The SSH client facilitates the secure connection between your local machine and the Raspberry Pi.
Heres a simplified guide to the setup process:
- On the Raspberry Pi:
- Install a VNC Server (e.g., `sudo apt update && sudo apt install tightvncserver`).
- Configure VNC Server (set a password when prompted).
- Configure SSH Server (enabled by default).
- Open a terminal or command prompt.
- Establish an SSH tunnel using the following command (replace `pi` with the username and `192.168.1.100` with the Raspberry Pi's IP address):
`ssh -L 5900:localhost:5900 pi@192.168.1.100` - Open a VNC viewer and connect to `localhost:5900`.
The command `ssh -L 5900:localhost:5900 pi@192.168.1.100` creates a secure tunnel. The `-L` flag is the key component here; it tells SSH to forward a local port to a remote port. In this case, port 5900 on your local machine (your computer) is forwarded to port 5900 (the default VNC port) on the Raspberry Pi. The SSH connection encrypts all the traffic that passes through this tunnel. This includes the VNC traffic. After you enter your Raspberry Pi's password, the SSH tunnel is established and you can use your VNC viewer.
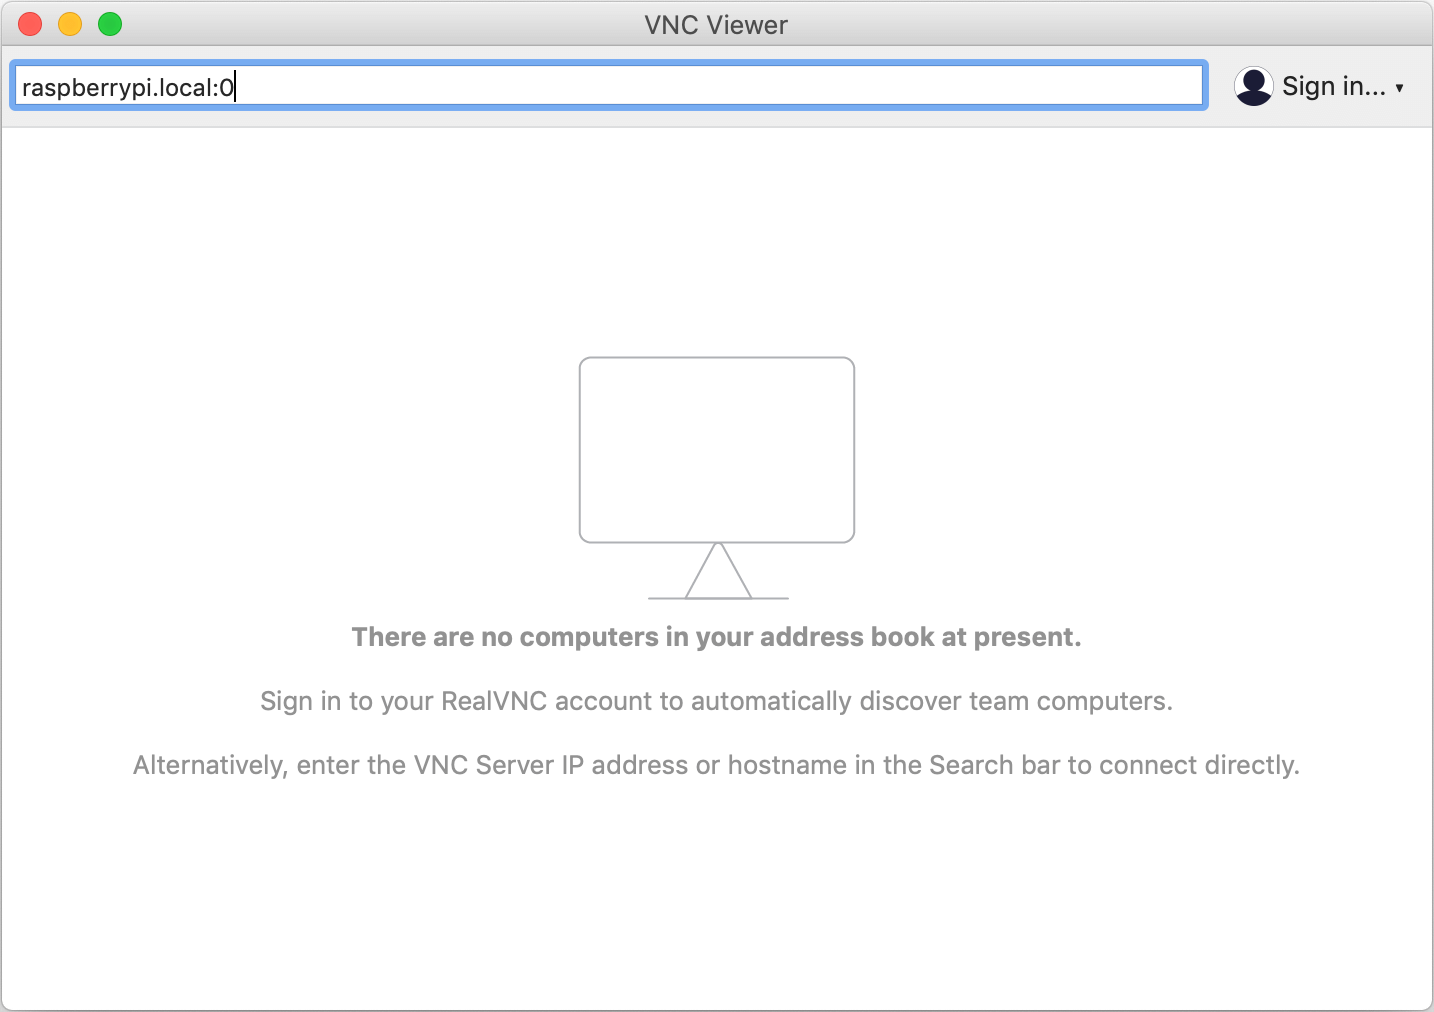
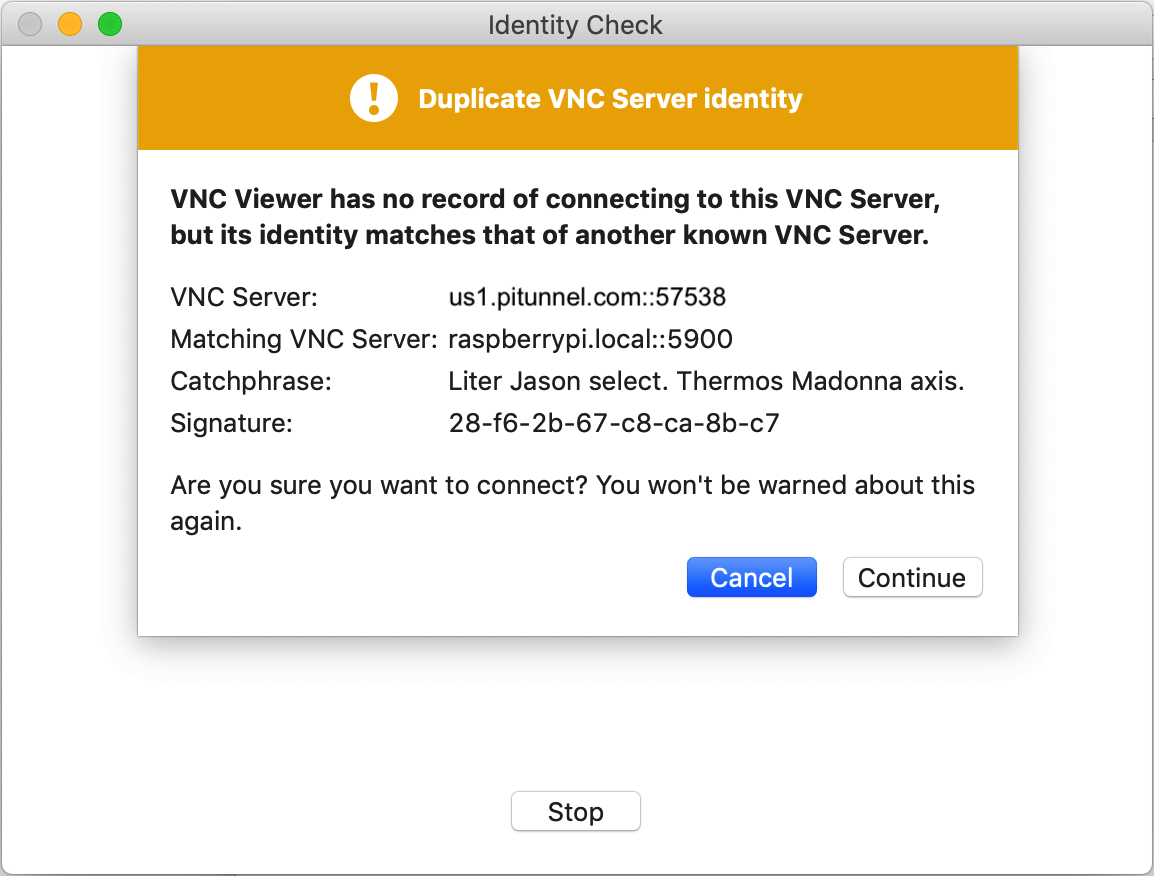
After establishing the SSH tunnel, open your VNC viewer of choice on your local machine. Enter `localhost:5900` as the connection address. The traffic is encrypted over the SSH tunnel to the Raspberry Pi's VNC server. You will then be prompted for your VNC password. Entering this correctly will grant you access to the Raspberry Pis desktop, all securely transmitted over the internet.
Port forwarding can be set up on your router to allow VNC traffic. Although less secure than using SSH tunneling or a VPN, it is still used. You will need to identify your Raspberry Pi's IP address, find the port forwarding section in your router's configuration settings (usually accessed through a web browser), and create a rule that forwards incoming traffic on port 5900 (or the port you've configured for VNC) to the Raspberry Pi's IP address. This is a straightforward configuration to implement and the steps vary greatly based on your router model. However, it is critical to realize that without encryption, the VNC traffic is vulnerable. Therefore, consider carefully before using this method.
Another security practice is the use of a firewall. A firewall on the Raspberry Pi can restrict incoming connections, allowing only authorized connections. This adds an extra layer of defense, preventing unauthorized access even if other security measures fail. Configure your Raspberry Pi's firewall (e.g., using `iptables` or `ufw`) to allow only connections from specific IP addresses, thus limiting access to trusted devices. The configuration will vary depending on the choice of firewall, and some require command-line proficiency. This ensures that only trusted users are able to connect to your Raspberry Pi, improving security considerably.
Beyond the basics of secure VNC connections, consider other methods to further enhance security. Using a strong and unique password for your VNC server is paramount. Enable two-factor authentication (2FA), if possible, to add an extra layer of security to your SSH connection. Keep your Raspberry Pi's operating system and all installed software up to date to patch known security vulnerabilities. Regular security audits are useful as well to ensure your system is not exposed to malicious attacks. These practices are essential to protect your system.
While VNC over the internet offers enormous potential, performance considerations are also significant. The speed of the connection, the resolution of the display, and the complexity of the VNC client/server software all impact performance. Using a lower resolution, reducing the color depth, or even choosing a different VNC server implementation can have a positive effect. You can also optimize network performance.
The choice of VNC software matters. RealVNC offers commercial and free versions and is known for its performance and security. TightVNC is a free, open-source alternative, offering a good balance of features and performance. TigerVNC is another open-source option, designed for high performance. The choice depends on your specific needs, performance requirements, and budget.
The internet connection itself has a major impact. The upload speed of the Raspberry Pi's internet connection is particularly important because it determines the speed with which the screen updates are sent to the client. A faster upload speed translates into a more responsive remote experience. Additionally, network latency (the time it takes for data to travel between the Raspberry Pi and your viewing device) influences responsiveness. Lower latency generally means a smoother experience. If possible, connect the Raspberry Pi to the internet using a wired Ethernet connection. Ethernet connections are typically faster and more stable than Wi-Fi, potentially improving performance.
Optimizing network settings can also help. Configure Quality of Service (QoS) settings on your router to prioritize VNC traffic, which ensures that the VNC traffic receives the highest priority, and reduces the likelihood of it being impacted by other network traffic. Consider using a dedicated IP address for your Raspberry Pi. This avoids the need to reconfigure your router's port forwarding rules if the Pi's IP address changes. The internet connection, the software settings, and your Raspberry Pi hardware all affect the performance. Optimizing these aspects can yield significant improvements.
Let's summarise the key points: Setting up "vnc pi over internet" involves configuring VNC software on your Raspberry Pi, choosing a secure connection method (ideally SSH tunneling or a VPN), securing your connection with strong passwords and two-factor authentication, and optimizing network settings for performance. The careful approach will lead to a secure and enjoyable remote access experience.
For those looking to expand their technical knowledge, several resources can offer further guidance. The Raspberry Pi Foundations official website is a great starting point. You can find excellent resources online to guide your configuration. Numerous websites and forums also offer troubleshooting tips.
In conclusion, remote access to your Raspberry Pi over the internet is no longer an overly complex task. With readily available technologies and a careful approach to security and performance, you can harness the full potential of your Raspberry Pi from anywhere in the world. The steps outlined, together with the security considerations, will empower you to remotely manage and control your Pi securely. This empowers users to monitor, manage, and expand the capabilities of their projects from anywhere with an internet connection. The rewards both in terms of convenience and the potential for innovation are considerable.

